Playing with Stable Diffusion Part 2: Sketch to Realism
Tags: Stable Diffusion
Posted on Thursday 29 Dec 2022, 15:36 (last modified: 29 Dec 2022, 16:28)
Introduction
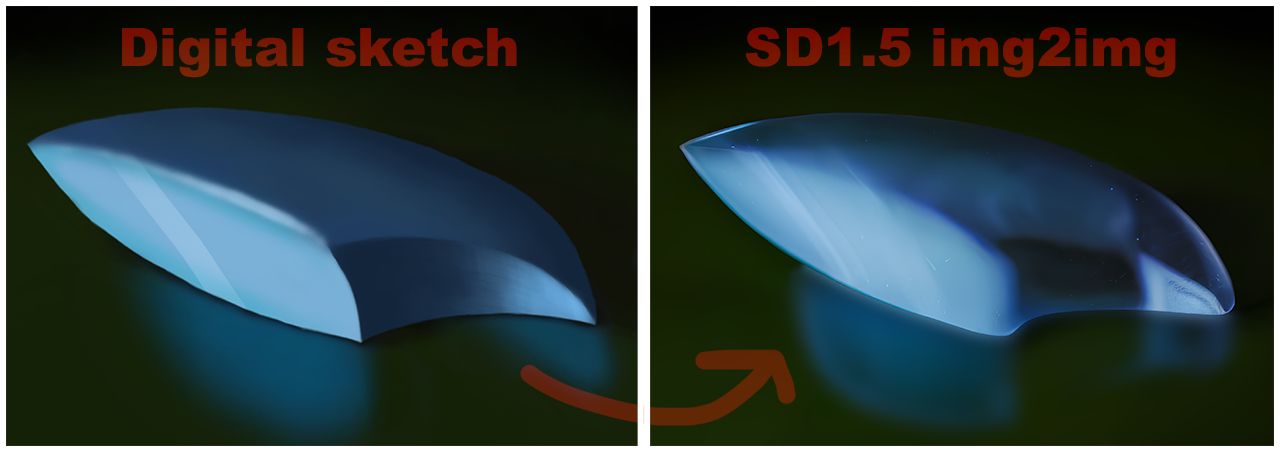
Stable Diffusion (SD), and other txt2img/img2img AI models that have come out this year, are seriously impressive. Here's my attempt to turn a simple digital sketch into a realistic looking photograph of an object.
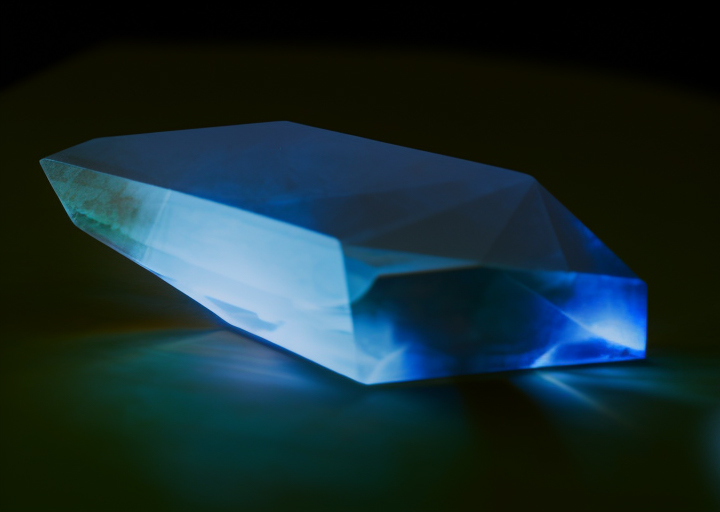
While I mostly do photography as 'art', every now and then I go try to learn digital painting. It's fun, but challenging and time consuming, and I'm nowhere skillful enough yet to create what I want. Below is a digital painting of a imagined gemstone that I made to practice shapes and lighting:
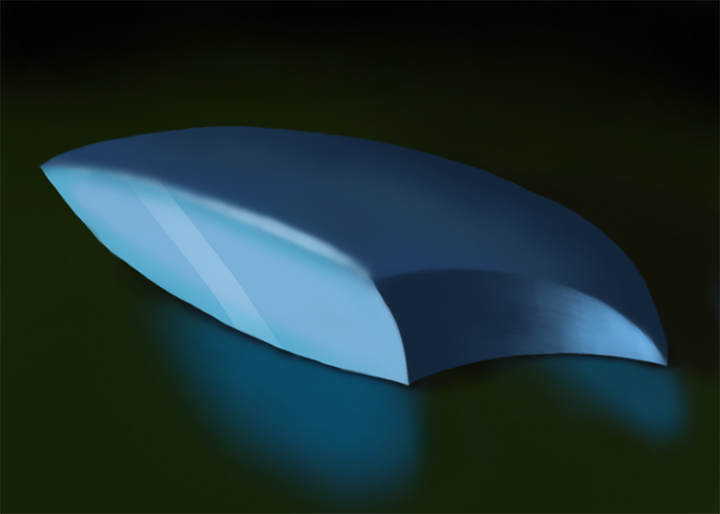
The input digital painting as a starting point for img2img, 720x512px
Let's use it as a basis for Stable Diffusion and see how realistic it can be made.
This is all done using SD (v1.5) in Google Colab, which is a quick and cheap way to get started with an advanced tool that most people seem to use (AUTOMATIC1111 webgui).
First attempt
My goal is to get a realistic looking image, or rather photograph, of a gemstone. I start out with the following prompt:
gem, glow, sapphire, soft light, photograph, sharp
Which gives a whole range of unsatisfactory results:
Likely, because the word gem or sapphire are already too specific in terms of geometry, and the geometry I drew is different. If I tell the model to be closer to the input image (denoising strength), it doesn't have enough freedom to generate an output in photograph style, either.
This is what I get from the prompt without the input image (so, just txt2img), which isn't really what I'm looking for:
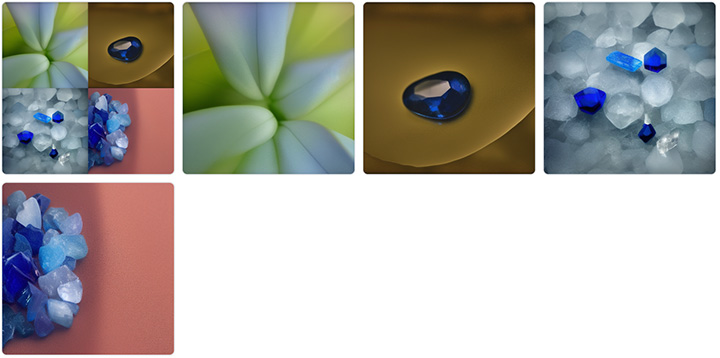
Some txt2img results on the simple prompt gem, sapphire, photo
One trick to get better results is to pick the output image that is closest to what I'm going for, and then use that as the new input. This gives the model a starting point that's closer to the prompt, and perhaps allows me to reduce the denoising strength to preserve the structure. I pick my favorite result from the earlier prompts, and run the model again. This is the result from the second round of img2img:
img2img run on the best output from the first attempt
While it looks quite cool, and resembles the original input, it still isn't really what I am going for. The edges are too sharp, the shape is too geometric, the photograph focus is on the far left edge. The lighting is cool, though, with seemingly realistic glow on the table.
Second attempt: preserving structure with better prompts
Now, let's "interrogate" the input image first, which gives a prompt based on the image. That should give the img2img model later a better prompt to generate what I am really after. This is what I get back:
a blue object is laying on a black surface with a green background and a black background with a black background, by [artist]
So apparently, the model indeed doesn't recognize my input image object as a gem or sapphire, but rather as an... object. Let's slightly tweak the prompt though, I find 'object' too generic and remove the artist style it adds.
a blue stone is laying on a black surface with a green background and a black background with a black background
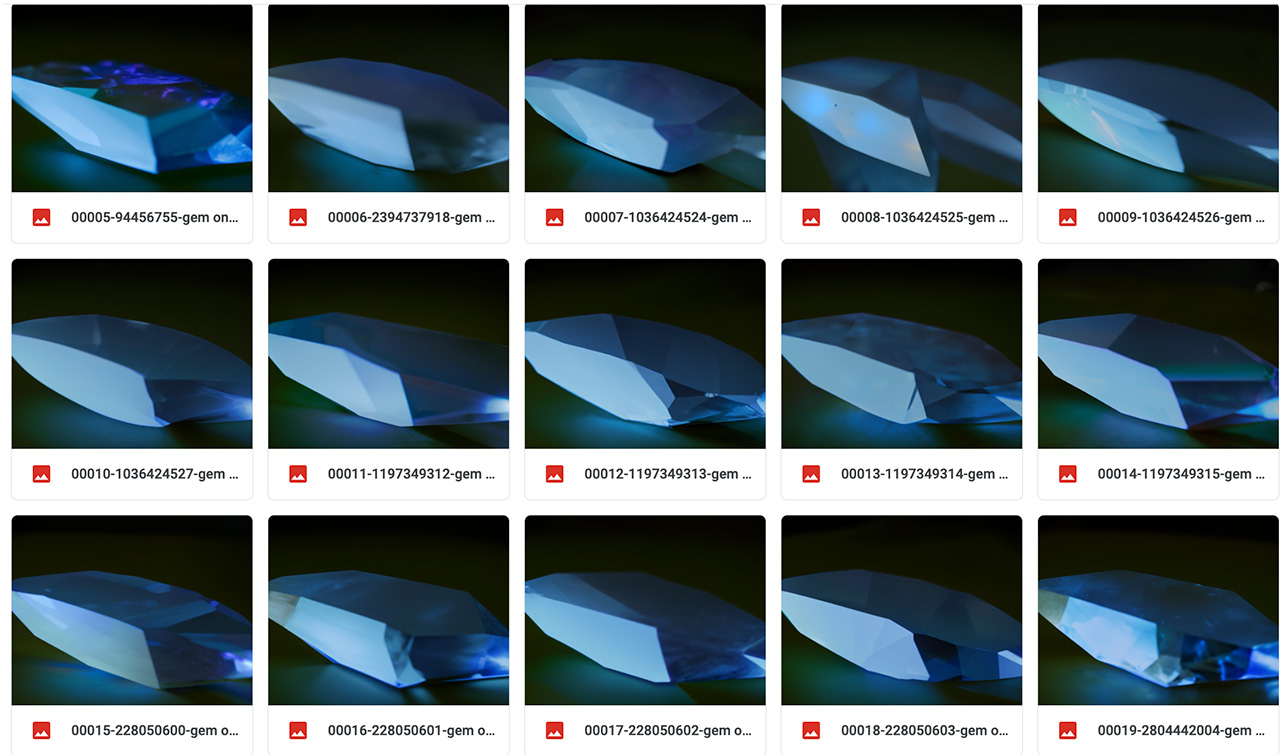
This gave much better results, the original sketch is already improved upon, here are some of them:

img2img now produces objects with the geometry that I have in mind
Let's continue using the seed of my favorite pick, top left one: 340396064. I am now going to add the photography realism to the prompt by adding photograph in front, and run it for a range of denoising strengths and CFG scales, to figure out how the model behaves.
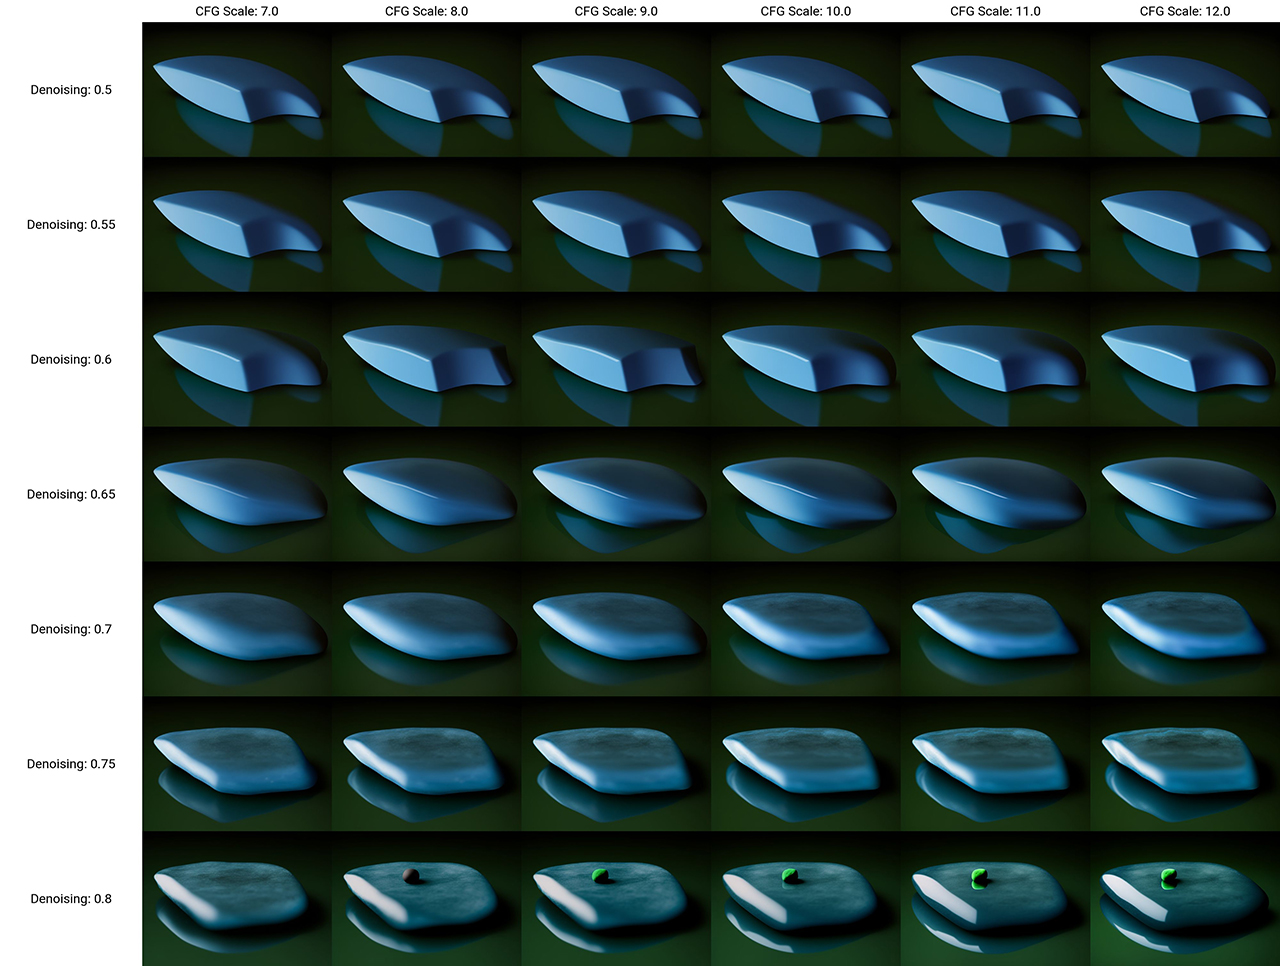
photograph, a blue stone is laying on a black surface with a green background and a black background with a black background
The original shape is already lost with denoising above 0.55, but that is also the minimal value to get more photography-like results. Let's try again with a different sampler, LMS instead of Euler-a. This is pretty much trial and error at this point.
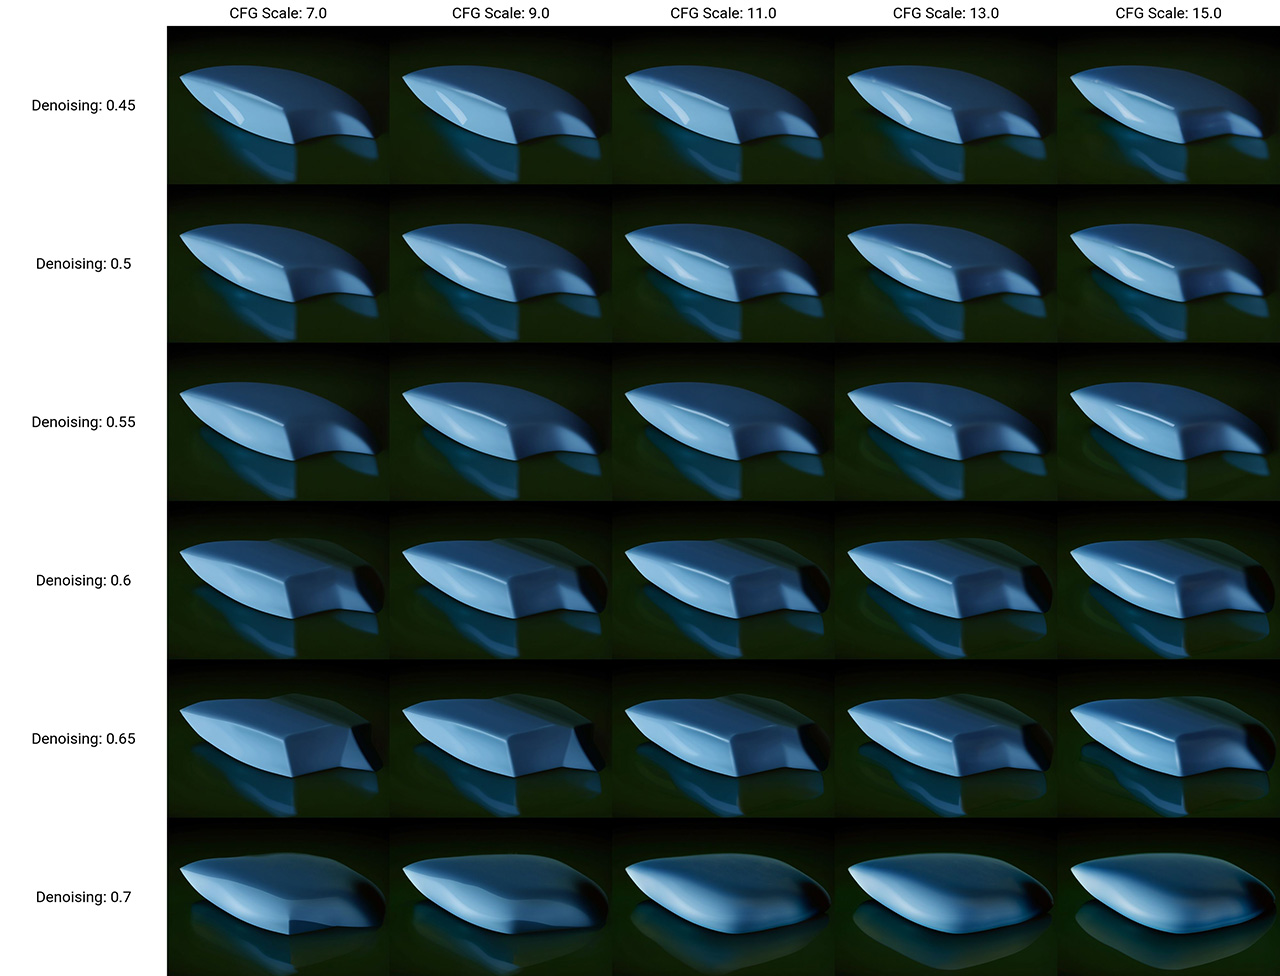
Same prompt, but now LMS instead of Euler-a
Personally, I think these are starting to look pretty cool. At the very least, they're improvements over my orignal sketch drawing. Here is my favorite one, it adds the shiny character and shape, color, and reflections are good:
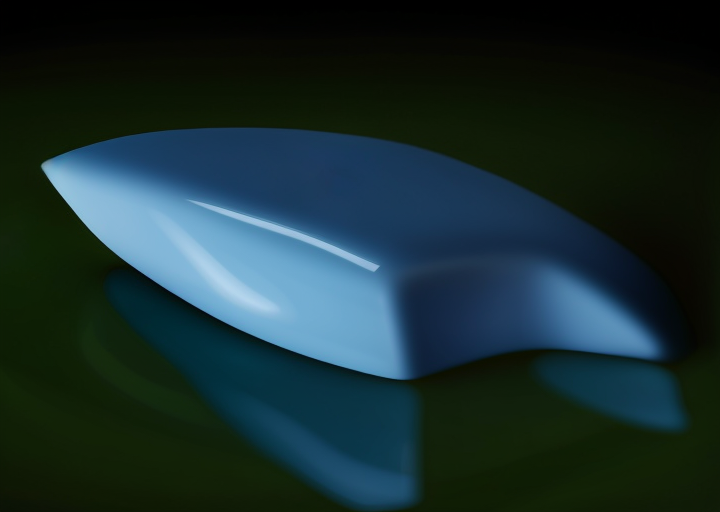
Favorite pick from the LMS range of results.
Attempt three: adding photo realism
The problem is that it's still not a realistic looking stone or photograph style. Let's try some more prompt variation using the training settings that gave the above result. I will be more explicit with what kind of photograph, e.g. 85mm as a focal length, which triggers the model to generate content that was trained from photographs. Prompts like realistic don't work, they're terms in digital art for the more detailed and realistic styles, not actual realism like photos. Also, I intended the stone to be transparent, for a cooler light effect. Here's what I came up with:
photo, photograph, 85mm, a transparent stone is laying on a black surface with a green background and a black background with a black background
And only after a few generation attempts, I get this one, which is close to what I had originally in mind!
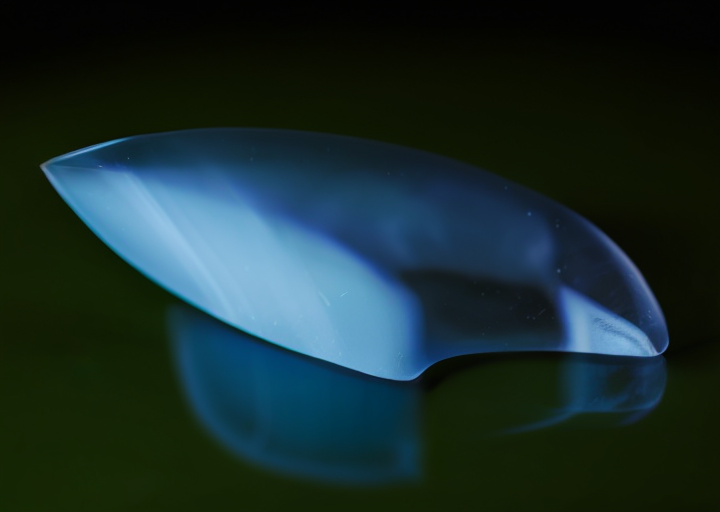
My favorite result from the img2img model
Let's throw it into the upscaler and apply some basic photography post processing in photoshop. Here is a detail comparison and below is the final image at x4 the original 720x512:
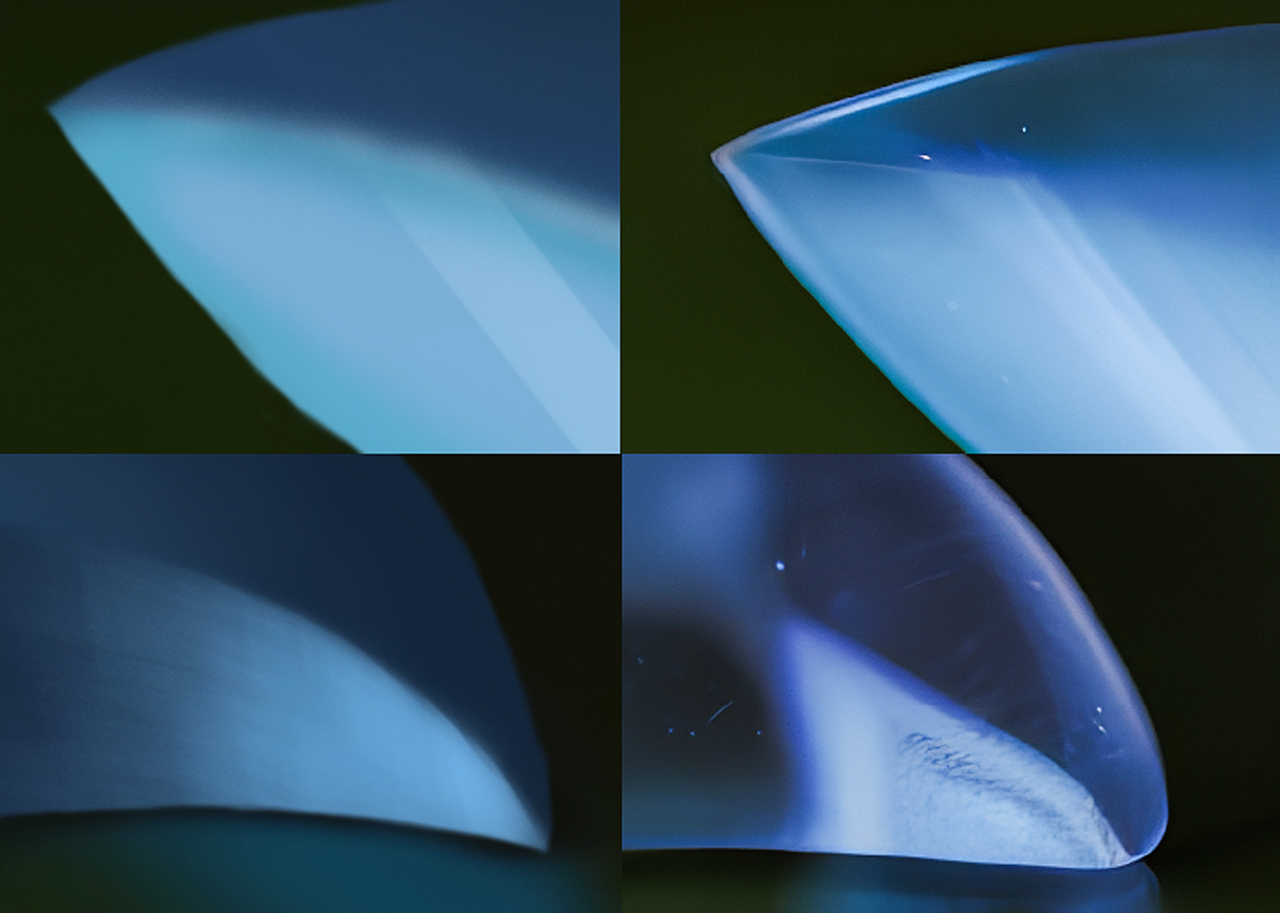
Open full resolution in new window (1.8 MB)